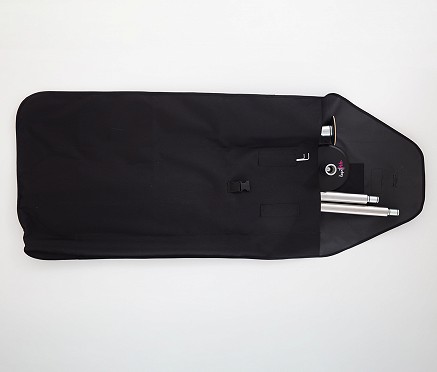
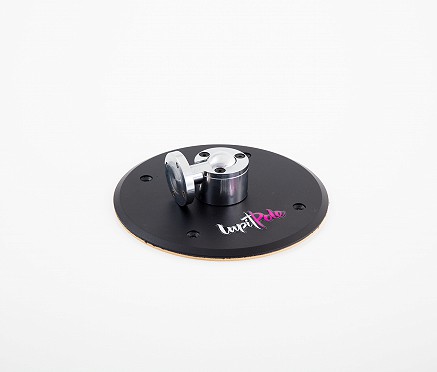
Features
- Chrome finish
- High quality
- Made in the EU
Latest updates
- New improved polishing - higher grip on all poles
- New improved Joint system
- New environmental boxing
Shipping cost
| Countries | price | delivery time/ working days |
| All EU countries (except Malta, and Cyprus) | 19,99€ | 1-6 |
| All Europe countries with Malta, Cyprus (except EU countries) | 19,99€ | 5-15 |
| Slovenia | 9,99€ | 1 |
| USA, all states except Puerto Rico, Hawaii, Alaska | $34,99 | 5-10 |
| Alaska, Hawaii, Puerto Rico | $49,99 | 6-10 |
| Canada, Mexico | 34,99€/ $44,99 | 5-10 |
| Rest of the world | 44,99€ | 5-11 |
| Australia, New Zealand | 49,99€ | 7-9 |
| Australia New Zealand Parcel | 44.99€ | 10-15 |
Frequently asked questions
Chromium coatings usually consist of nickel as the base material and a very thin chromium layer as the finish. In this case, allergies to nickel may occur. Stainless steel, on the other hand, also contains nickel, but it is combined with steel and other elements to form a new metal. This means that fewer nickel particles come into contact with your skin. We cannot assure you that you will not be allergic to stainless steel, although we have not received any reports of allergies on our poles to date.
Lupit portable home poles can be installed in minutes depends on how skilled is the person. I would say that the average person can do the first installation in 15 min. The next time it will take only 5 minutes.
Lupit studio removable or permanent poles are usually installed by a skilled person. We would say that on average, a person can do first pole installation in 20 min but usually, there is more than one so the next pole can be installed in 10-15 min. It all depends on the ceiling, flooring material, and construction.
Lupit Stage can be installed in 10-15 minutes depends on how skilled is the person. I would say that the average person can do the first installation in 25 min. The next time only 10-15 minutes.
Lupit home poles have all the tools included except the water level and ladder.
Lupit Stage has all the tools needed to be included in the package to install the studio poles, you would need some common tools like an electric or cordless drill, screwdriver, water-level, ladder. The screws, allen key, and plastic inserts for the concrete are included in the package.
The cover itself is there to cover the tension system of the pole and by default, it is a not usable area of the pole. It is only meant to be a protective shield to prevent a performer from getting in contact with the mechanical elements used to extend the pole and secure it against unscrewing.
The mask is used to cover and protect the thread and fixing elements of the bottom of the pole. It is not meant to be used for gripping and making turns on it since it can get loosen. However, you can hold it or touch it with other parts of the body. Pressing on the cover might cause damage to the cover’s thread and make it hard to screw/unscrew at installation.
Depends on coating:
Stainless steel and Chrome poles can be cleaned with a cotton cloth and Nitro diluent 900, or pure alcohol or water and then wiped with dry cotton or microfibre cloth.
Powder-coated parts should be cleaned only with pure alcohol or water and then wiped with dry cotton or microfibre cloth.
Make sure you do not use glass cleaners, especially if they contain the Ammonium Hydroxide Cleaning Agent
Cleaning of the rubber surface on discs is also very important. Use pure alcohol for regular cleaning and nitro diluent 900 for refreshing the surface to be stickier.
Usually, the pole is just overtightened. Follow the instructions and tighten the pole by hand. Then hold the pole A while you secure the bottom nut of the pole against the top nut with the wrench. So, first, tighten the pole and tighten part A just enough to secure the pole, and then tighten the lower nut very tight against the upper nut. First, you need to hold the top tube of part A by hand and tighten the "bottom nut" with the tool, and then in the last phase use the second tool to hold the top nut.
The rod should now be stable and secure.
If the pole is not vertical, it is possible that the force on a bearing system is not evenly distributed, which can create additional resistance. To bring the mast to a vertical position, use a water leveller.
The bearings are dirty or dry. You must lubricate the lower bearing system and the upper bearing every 3 months with daily use. Machine oil or grease for the bearings in a spray can is the best way to lubricate. Follow the video instruction here.
Yes, you can:
The standard pole setup included in the package is for ceiling heights between 2300 mm and 2800 mm.
To go higher than 2800 mm you need to purchase a 500 mm extension.
To go lower than 2300 mm you need to purchase extensions according to this table: In your case, you need to purchase two 500 mm extensions.
Our amazing Marion Crampe on why Lupit poles are one of the best on the market.
Proper installation is an essential part of the safety measures.
Lupit has a wide range of portable poles.


